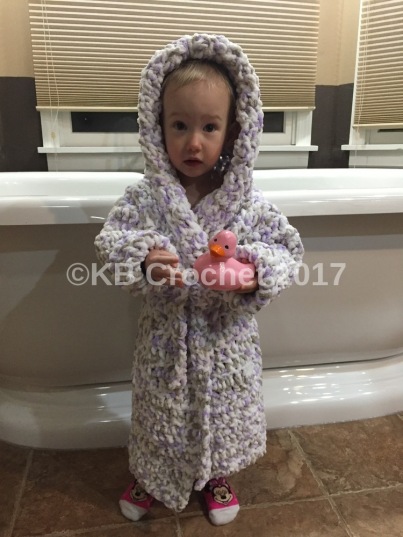
My daughter outgrew the bathrobe I made her, so it was time to get a new one started! She’s still wearing 18 months due to her tiny little waist, but she really needs the length of a 2T. There is not a lot of difference in important bathrobe measurements (chest, sleeve, lenght, neck) between at 2T and 3T, and bathrobes are meant to be a loose and comfy. I decided to make one that would fit her when she is in 2T and 3T sizes. I do have a link at the bottom of the page to my original pattern which fits a size 12-18 months.


I absolutely love the yarn that I use for my bathrobes. Bernat Baby Blanket is soft, thick, and has just the right weight for a toddler bathrobe. Plus, it wear well and is machine washable on delicate and dryable on low. Those are all VERY important qualities in toddler clothes! I chose the color Little Lilac Dove, because I liked it best out of the choices I had at the store on the day I cought the yarn. I wasn’t super thrilled or excited about it at the time, but I fell in love with it as it worked up. These colors are so sweet together.


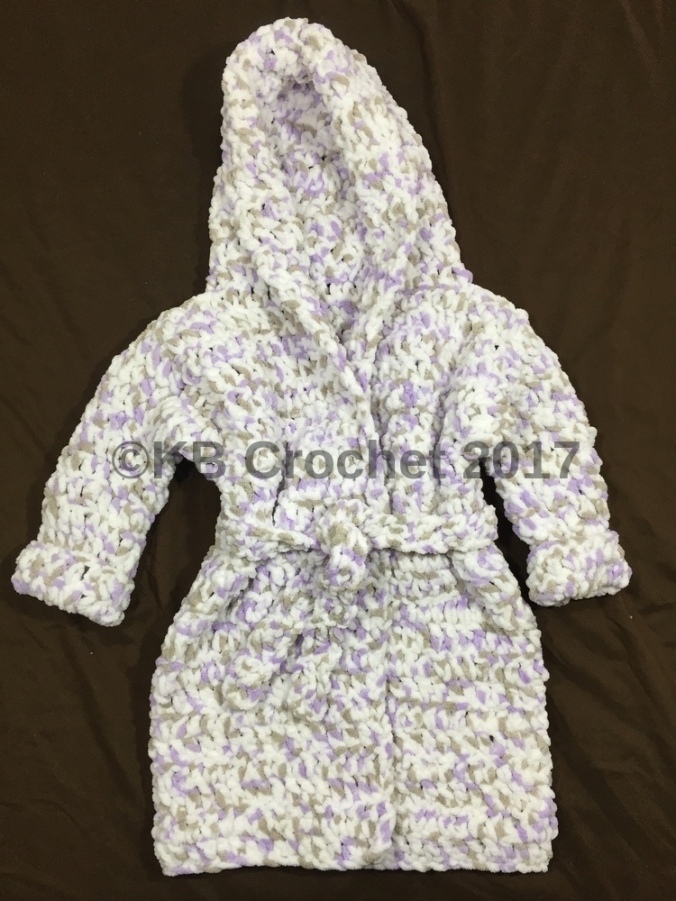
I was able to build on my original bathrobe to get the correct measurements, and in the meantime made some corrections to the original pattern. Overall this project worked up a lot more quickly than I expected with the additional size added in. The project is worked in 4 main sections: the bottom section, the top panels, the hood, and the sleeves. You will also need to make a belt, which I group in with the sleeves.


Additional Sizes:
12/18 Month Toddler Bathrobe Pattern
Children’s Sizes 4-12 (untested)
Adult Sizes M/W S-XL (Untested)
Printable PDF Version 2-3T Bathrobe
For this pattern you will need the folllowing:
Yarn- Bernat Baby Blanket in any color (pictured in Little Lilac Dove), you will need 2 big balls and one little ball, or 7 little balls
Size K crochet hook
Scissors and tape measure
Gauge: 9/10 stitches, 4 rows= 4 inches
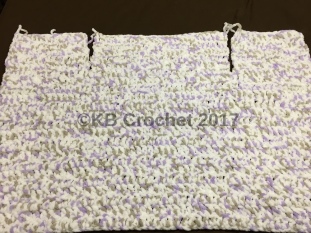
Section 1: The Bottom
Ch 62
Row I skip 3, DC across (60 st)
Row 2-Ch 2 turn, DC in same stitch and in each stitch across (60 st)
Row 3-15- repeat row 2. Do not fasten off.
You can increase or decrease the number of rows for a longer or shorter bathrobe, but remember when you are finished with this part that it only represents the length from the bottom of the armholes to the bottom seam.
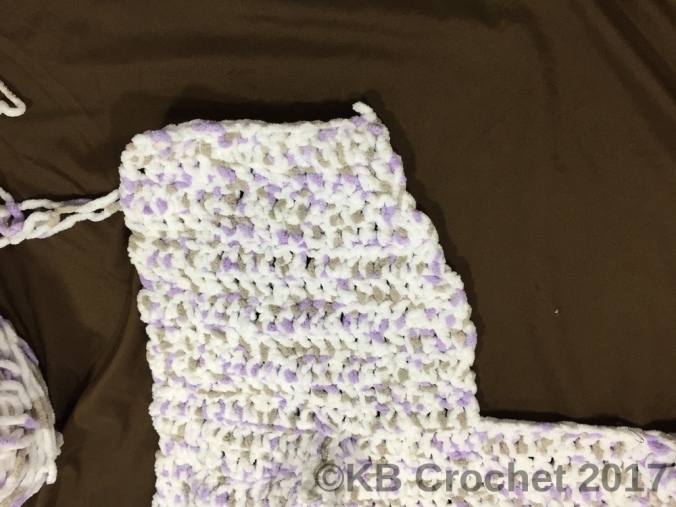
Section 2: The Top Panels
Now you will work 3 separate sections which will become the 2 front panels and the back of the robe.
1st front panel-
Row 1- Ch 2, DC in same stitch and in each of next 15 stitches (16 DC)
Row 2-7- Ch 2, turn, DC in same stitch and in each stitch across (16 DC) Fasten off

Back Panel-
Return to last row of Bottom Section. Starting in the first stitch following the first front panel, join with slip stitch.
Row 1- Ch 2, DC in same stitch and in each of next 27 stitches (28 DC)
Row 2-7- Ch 2, turn, DC in same stitch and in each stitch across (28 DC) Fasten off.
2nd Front Panel:
Return to last row of Bottom Section. Starting in the first unworked stitch, join with slip stitch.
Repeat first front panel. (7 rows of 16 DC)
* or, you can also turn the robe so the other side is facing and rework the front first panel on the opposite side (from outside to in)
Join Shoulders:
Fold the front panels over to meet in the center. Slip stitch the outer 6 DC on each front panel to the outer 6 DC on the back panel.
Your piece should now resemble a vest, with 36 unjoined stitches across the top.


Section 3: The Hood
The hood is worked in 2 sections which are stitched together.
First Section:
Join with slip stitch to the 1st of the first of the unworked 36 stitches of the neckline.
Row 1: Ch 2, DC in same stitch and in next 9 stitches across, 2 DC in corner, DC in next 8 stitches. (20 DC) This row will end in the center of the back panel. Leave the remaining stitches in that row unworked.
Row 2-4: Ch 2, turn, DC in same stitch and in each stitch across (20 DC)
Row 5: Ch 2, turn, DC in same stitch and in next 17 stitches across, decrease DC over the last 2 stitches (19 DC)
Row 6: Ch 2, turn decrease DC over same stitch and next stitch, one DC in each of the next 17 stitches (18 DC)
Row 7:Ch 2, turn, DC in same stitch and in next 15 stitches across, decrease DC over the last 2 stitches (17 DC)
Row 8: Ch 2, turn decrease DC over same stitch and next stitch, one DC in each stitch across (16 DC)
Row 9: Ch 2, turn, DC in same stitch and in next 13 stitches across, decrease DC over the last 2 stitches (15 DC)
Row 10-11: Ch 2, turn, DC in same stitch and in each stitch across (15 DC)
Second Section:
Turn your entire robe and join with a slip stitch to the opposite side of your robe in the first of the remaining unworked stitches from the neckline. (at the corner, not next to the first hood section.
Work the same as you did for the first section.


Stitch the two hood sections together.
Section 3: The Sleeves and Belt
Sleeves:
Join with slip stitch to the bottom stitch of the armhole.
Round 1: Ch 2, DC 22 times evenly around the armhole. (22 DC) Optional: To decrease gaps at the bottom and top of the armhole, DC 2 together.
Round 2: Ch 2, DC Dec in same stitch and next stitch, DC in each of next 18 Stitches, Dec over last 2 stitches (20 DC)
Row 3: Ch 2, DC Dec in same stitch and next stitch, DC in each of next 16 Stitches, DEc over last 2 stitches (18 DC)
Row 4: Ch 2, DC Dec in same stitch and next stitch, DC in each of next 14 Stitches, DEc over last 2 stitches (16 DC)
Row 5-12: Ch 2, DC in same stitch and in each stitch around. (16 DC)
12 rows will give you enough sleeve length for a cuff. If you do not want a cuff, end sleeves after 10 rows. To roll your cuff twice or for a larger cuff, add 2-4 rows on the end of each sleeve.
Repeat for 2nd sleeve.
Belt:
Row 1: Ch 4, DC in 3rd chain from hook and in next ch (2 DC)
Row 2, Ch 2, turn, DC in same stitch and in next stitch (2 DC)
Repeat row 2 until belt has reached the desired length. Approximately 45-50 total rows.
For Additional Sizes:

So precious!! I love Bernat Baby Blanket! I have a few skeins of Pink Twist in my yarn stash waiting for the opportunity to use it. No babies on the horizon for anyone that I know. I should start a Grandma’s Hope Chest and fill it with blankets, booties, and thanks to your pattern, bathrobes for when the grandbabies start rolling in!
LikeLiked by 1 person
This looks so cozy! I might have to adjust the pattern and make one for my 5 year old. I wouldn’t mind one myself!
LikeLike
I have notes for starting a 4T/5T, but still need to test it! If you do modify and have questions, let me know!
LikeLiked by 1 person
i would love to see it sized up for 5T, and even 8.
LikeLike
I may need to post those sizes with a disclaimer that they aren’t tested yet…
LikeLike
Thank you so much
Respectfully Vonda Adamson
>
LikeLiked by 1 person
Oooh….I’ve got some bright green chenille that would be fun to use for this! 👍
LikeLiked by 1 person
Bright green would be awesome!
LikeLike
I am making this now and I am just starting. At the moment it looks big but I will keep going. Hope it turns out and good an nice as yours.
LikeLiked by 1 person
What are your measurements? I might be able to help. Did you do a swatch to make sure you have the right hook size?
LikeLike
This is what it is looking like
Respectfully Vonda Adamson
>
LikeLike
Did you attach a photo? If so, it isn’t showing up. The bottom should look like a rectangle.
LikeLike
Does the Ch2 of beginning row count as a dc?
LikeLike
No, I tend to have better edges when I don’t
LikeLike
My stitch gague is right, but my row gague is off. Do you have the finished measurements so I can work to those? My 2 year old is very excited for me to start this one for her. She picked out the yarn and eveything.
LikeLike
My daughters measures as follows: the bottom part (bottom to armholes) is 15 inches, the top part (done in 3 panels for the front sides and back) is 6.5 inches, so the total length of the robe is 21.5 from bottom to neck.
The width of the robe is about 30-30.5 inches. The hood is 10-10.5 inches deep at the base and 7 inches at the top. It is about 10 inches tall at the front. The armholes are 6.5 inches deep. The sleeves start are 12 inches long.
Let me know if I missed any!
LikeLike
Can it be made without the hood? I am making one for me and I’m not a hood kind of gal….
LikeLike
Yes. You can do the first few rows to make a collar.
LikeLike
So I just ran out for another ball of yarn, I ran short on the sleeve. So far for the women’s XL I have 6 full balls and I will need to open a 7th for a few rows in the sleeves. I will probably run a shell finish around the bottom only because I will have a darn near full ball.
LikeLiked by 1 person
Excellent! I need to get moving on testing sizes, but larger projects are so hard with a toddler and an infant 😄
LikeLike
I read some of the other comments and am still struggling – mine is coming out ridiculously small. I see your bottom panel measures 15 in, and mine is barely 10. I could understand a small difference because of personal tension but I’m starting to wonder if I have done something seriously wrong. I have a K hook and am using regular Bernat blanket (not baby), but according to their info it should be the same size. A K hook does seem to be barely big enough for this yarn, is there possibly a typo? What might I try for troubleshooting next? I can use a bigger hook to just work to dimensions but I want to make sure I haven’t made a mistake that changing those won’t fix.
LikeLike
If you are doing the correct number of stitches. I would try a hook 2-3 sizes up. Do you yarn over or under? When I yarn under, I would get a result similar to yours.
LikeLike
I yarn over. I ended up using an N and crocheting pretty loosely. Not sure why the K didn’t work out (I wasn’t crocheting tightly), but with the N it’s coming out perfect.
LikeLike
Pingback: 11 Easy Bernat Blanket Yarn Crochet Patterns For Beginners – Bulky Yarn Crochet Patterns - Knit And Crochet Daily